
Articles tagged ‘raspberry pi’
* Automatic plant watering with Raspberry Pi
3. December 2018, Jakub Horák. Categorized as IoT.
Who hasn’t had hers/his plants die at home while traveling for a few days? Unfortunately my plants suffered from this fate too. Since I already have my plants connected to the internet via Raspberry Pi, notifying me whenever the soil gets dry, one solution is to have that same event trigger actual plant watering. That’s what I set out to accomplish. By researching online, I stumbled upon an interesting tutorial Raspberry Pi Automated Plant Watering with Website which describes the hardware build very well, but adds a web server on top, which I find useless. I decided to run my own software stack.
Hardware parts necessary (assuming Raspberry Pi plant sensor is built already):
- mini motor water pump 3-6V
- 7-10mm aquarium hose
- container which can hold some water
- soldering iron, solder
- 5V relay
- old USB charger
After getting all the necessary parts, first step is to cut the USB charger phone part off and expose red and black wires. Next, solder the red wire sticking from the pump to the red wire exposed from the USB charger cable.
When the soldering is done, it’s time to connect everything together. See the complete wiring diagram with two moisture sensors in the figure below.
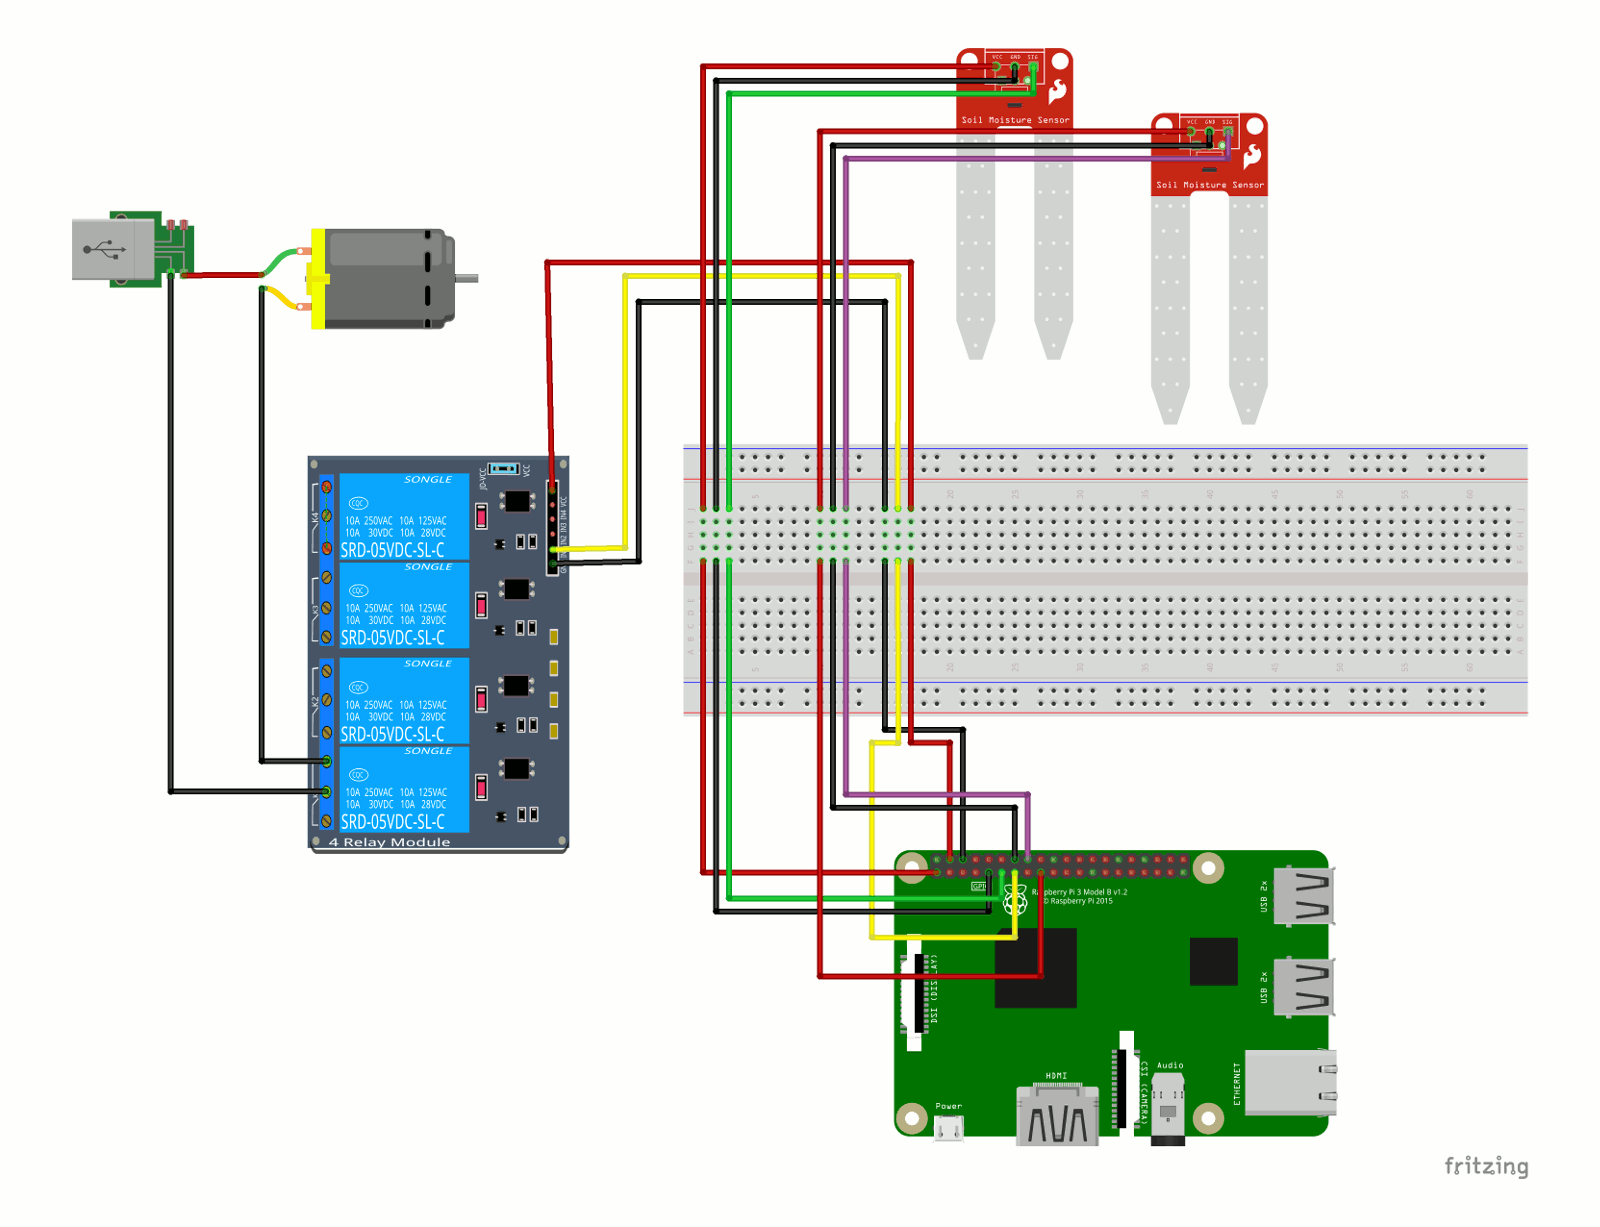
I have two sensors for two plants, but only one water pump for now.
Ports (as per pinout.xyz) used for the pump are (first relay, then Raspberry Pi 3):
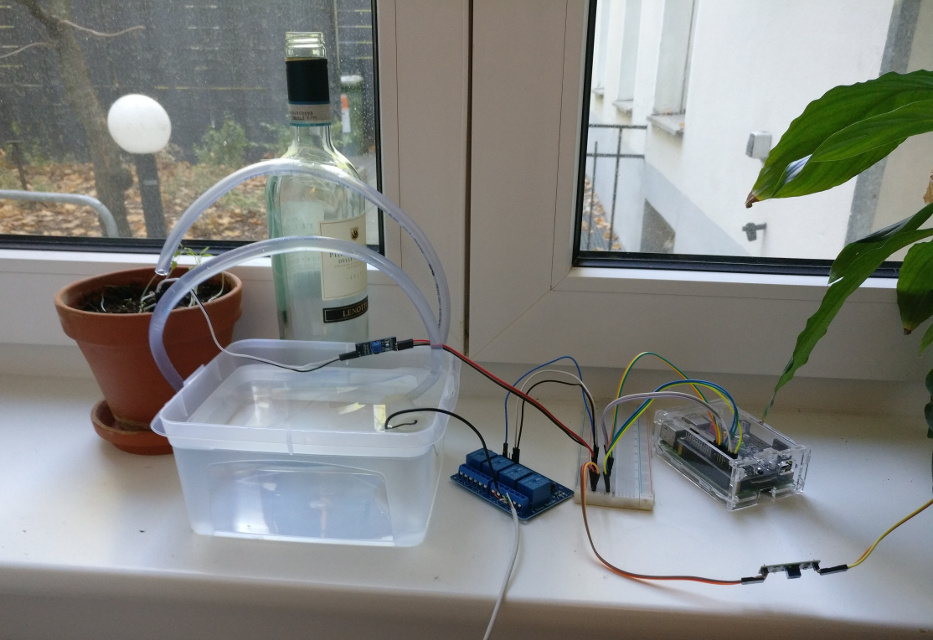
The next step is to fill the water container with water, tape the pump as close as possible to the container’s floor and use something (e.g. a wine bottle) to hold the outlet from the hose. I measured, that the motor can pump 23ml of water each second, thus it should be enough to pump for 1 or 2 seconds each time when the soil is dry.
As for software, get my updated scripts from the associated GitHub repo. The configuration from moisture.py can be seen below. First the moisture sensors are set-up:
# Define the GPIO pin that we have our digital output from our sensor # connected to and URL which to call on sensor state change sensors = { "peace_lily": (17, "** URL 1 **"), "parsley": (23, "** URL 2 **") } |
then the water pumps:
# Define the GPIO pin that we have our digital input to the # respective relay connected to and number of seconds to pump # each time pumps = { "parsley": (27, 1) } |
When I get my second water pump, after wiring, I will just add a new entry under “pumps” with the corresponding pin.
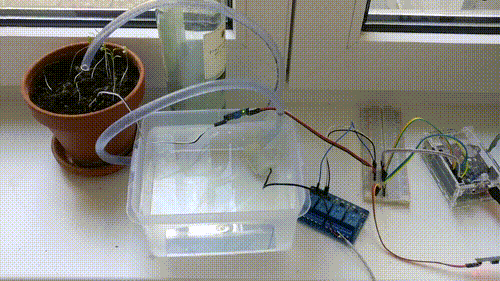
Watering system in action
That’s all folks, happy farming!
* Connecting plants to the internet
25. July 2017, Jakub Horák. Categorized as IoT.
I have a couple of pelargonium plants on my balcony and I’m always struggling to determine, when to water them. By chance I also have a Raspberry Pi 3 lying around, so I’ve decided to do a little IoT project, turn the plants into cyborgs and let them tell me, when they need watering.
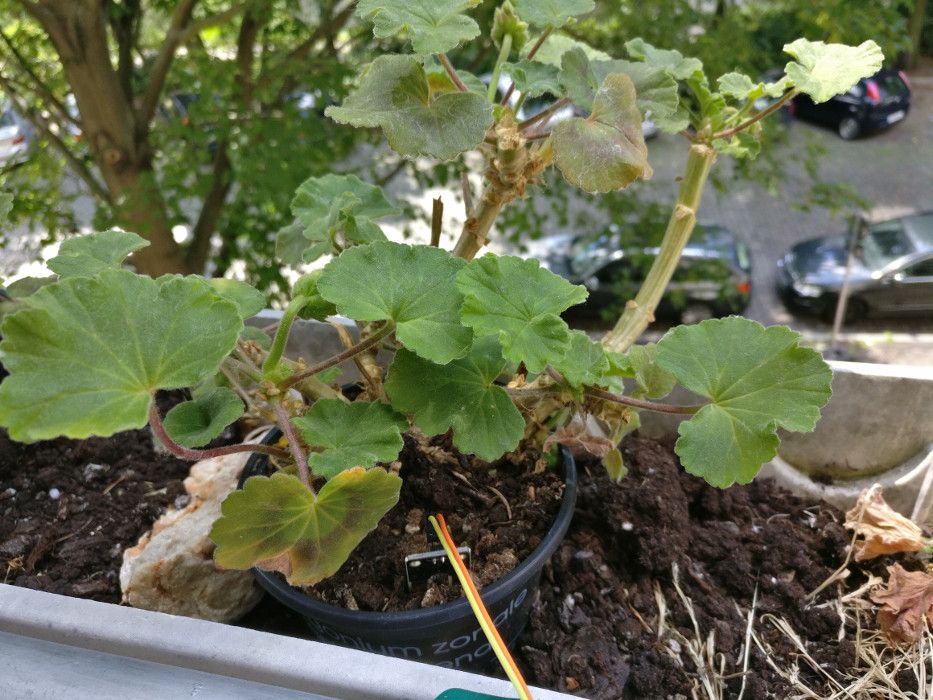
The connected plant
The basic setup is inspired by the Moisture Sensor Tutorial.
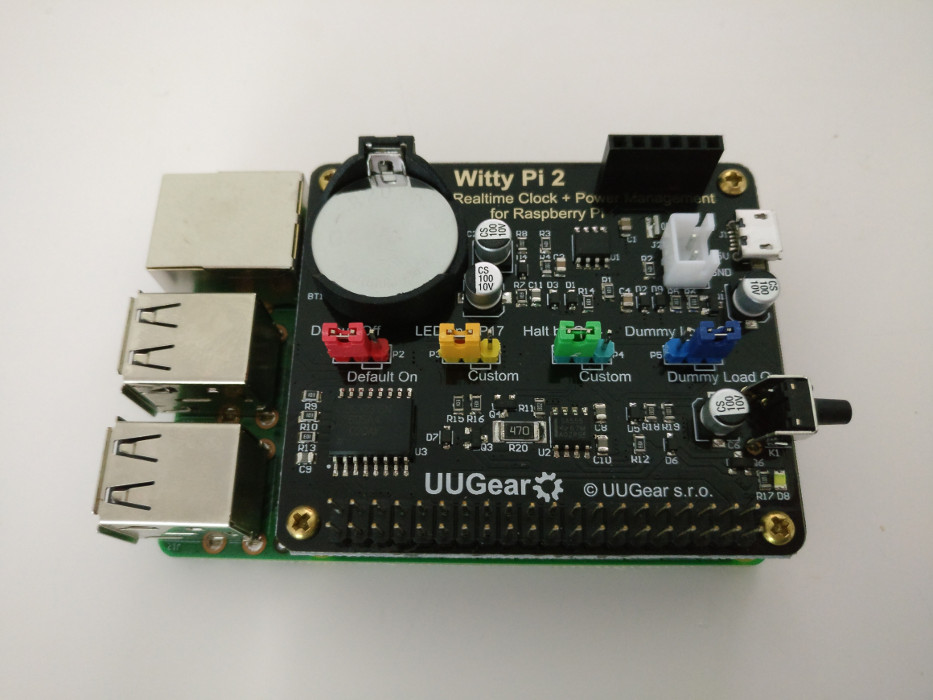
Raspberry Pi 3 with Witty Pi 2 mounted on top
To provide electric energy, I bought the Ravpower powerbank with capacity 26800mAh. However even the massive battery doesn’t last more than three days in this setup. That’s when I found a nice extension board for Raspberry Pi called Witty Pi 2, which will handle turning the Pi on and off based on a schedule, thus conserving huge amounts of energy. See the photo on the left. I set the schedule to turn the Pi on for 2 minutes once every 2 hours. The whole thing can keep running like this for about a month without recharging.
To summarize, here is a complete list of used components:
- Raspberry Pi 3
- Witty Pi 2
- Ravpower powerbank with capacity 26800mAh
- Moisture sensor
- Breadboard
- 5 jumper wires
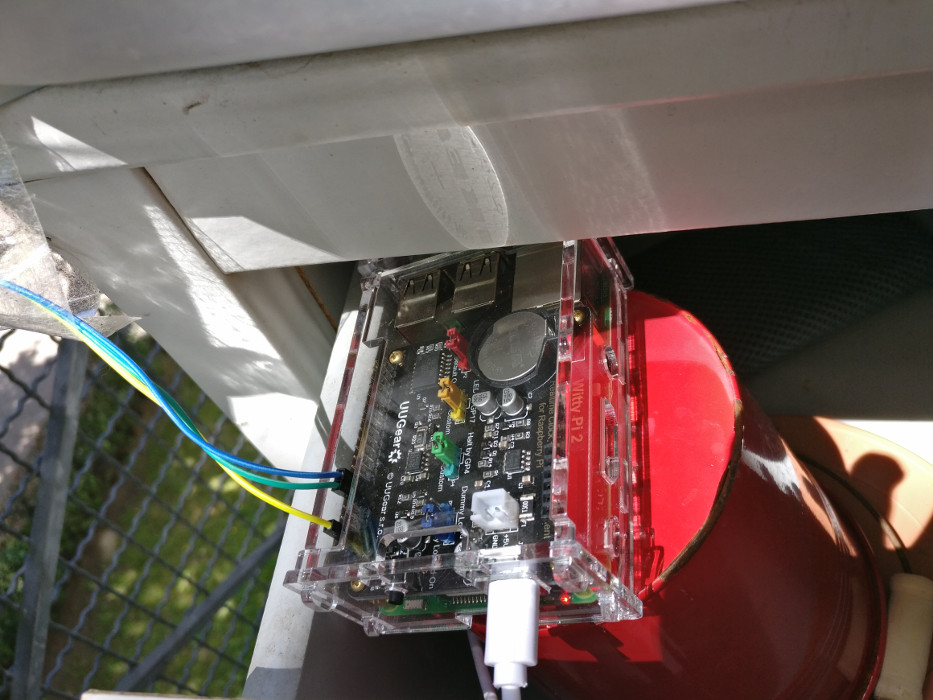
Placement in a drawer on my balcony
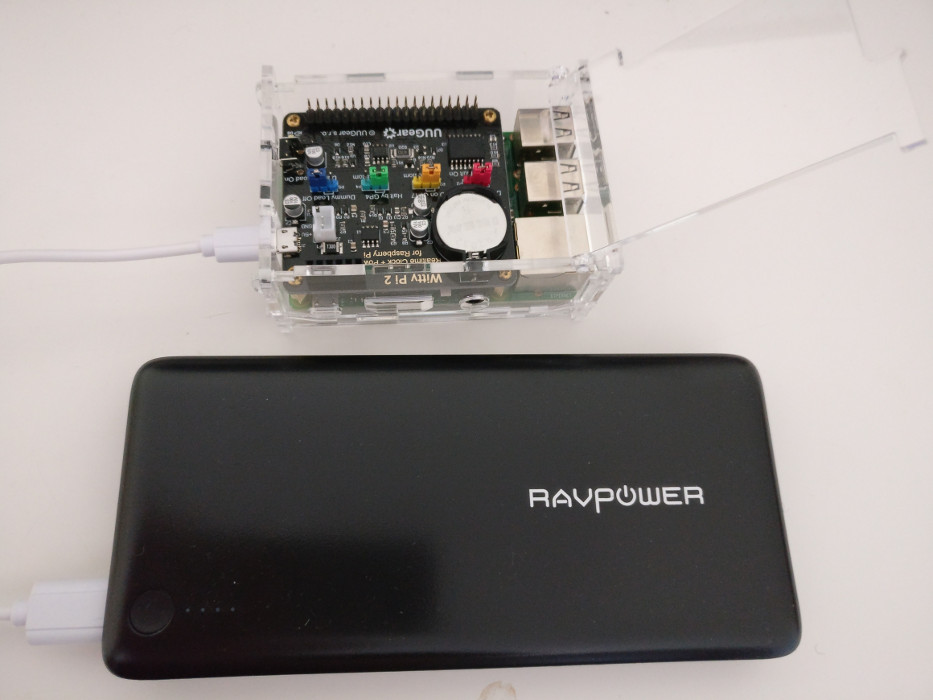
Raspberry Pi 3 with Witty Pi 2 on top and a powerbank
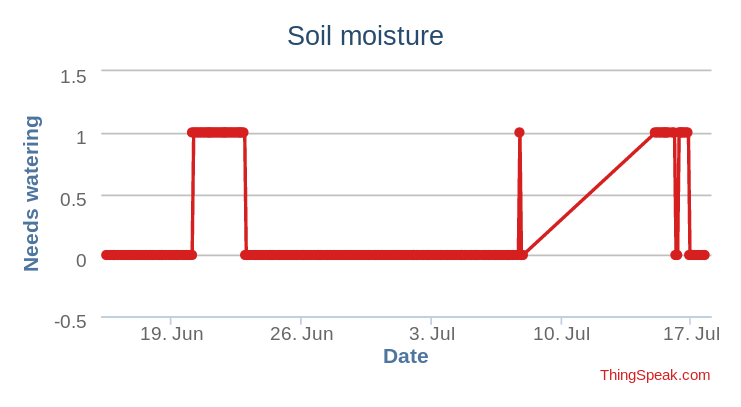
ThingSpeak chart
The hardware running smoothly, finally, let’s discuss the code. I started off with the tutorial’s Python sample and extended on that. I ended up with Ansible scripts. Ansible takes care of the configuration deployment, so whenever I’d format the Pi, I just need to install Raspbian, replay the Ansible playbook and I will get the same software installed and configured on it. Check the repo on Github. Pretty sweet!
Archives
- July 2025
- March 2024
- October 2023
- May 2020
- December 2018
- October 2018
- July 2017
- April 2017
- March 2017
- November 2016
- April 2016
- March 2016
- November 2014
- September 2014
- May 2014
- March 2014
- February 2014
- August 2013
- June 2013
- April 2012
- August 2011
- May 2011
- October 2010
- September 2010
- August 2010
- December 2009
- November 2009
- October 2009
- September 2009
- August 2009
- July 2009
- June 2009
- April 2009
- January 2009
- December 2008
- October 2008
- September 2008