For Christmas, I wanted to create a special homemade toy for my one-year-old daughter. I remembered seeing an article some time ago about someone making a wooden box toy for their niece, which played songs uploaded as MP3 files. I decided to adapt this idea and create a similar toy using 3D printing.
The concept is straightforward: a large red button that, when pushed, triggers a microcontroller to play an MP3 file through an amplifier and a speaker (I chose a 2W speaker).
In my initial prototype, I used two AA batteries, but they didn’t seem to provide enough power to the microcontroller to drive the audio speaker effectively. So, I purchased a cheap 5000 mAh powerbank. I attempted to power the USB port using the powerbank, but it wasn’t sufficient either. As a last resort, I opened up the powerbank and soldered the internal LiPo battery directly to the VSYS pin of the WeAct Studio RP2040. The battery now lasts for about 4 days, but this introduced a new problem. To charge the LiPo through the powerbank’s USB-C port or to use the USB-C port on the RP2040 to change the MP3 song, I needed to desolder the LiPo again, otherwise risking damage to the RP2040. To address this issue, I installed a small on-off slide switch between the battery and the VSYS pin of the RP2040. This allows me to disconnect the battery from the microcontroller and use the USB-C port on the powerbank for charging, or the RP2040 USB-C port to change a song.
To create the MP3 files, I used Audacity to select a suitable section of a song, roughly 10 seconds long. I then applied an “Amplify” effect to decrease the volume. The required decrease varied depending on the song, ranging from -7dB to as much as -18dB.
Since there are no ports on the outside of the box, I wanted to make the screw holes reusable. To achieve this, I used threaded heat-set inserts from CNC Kitchen. With a special soldering tip, it’s easy to install them into a 3D print.
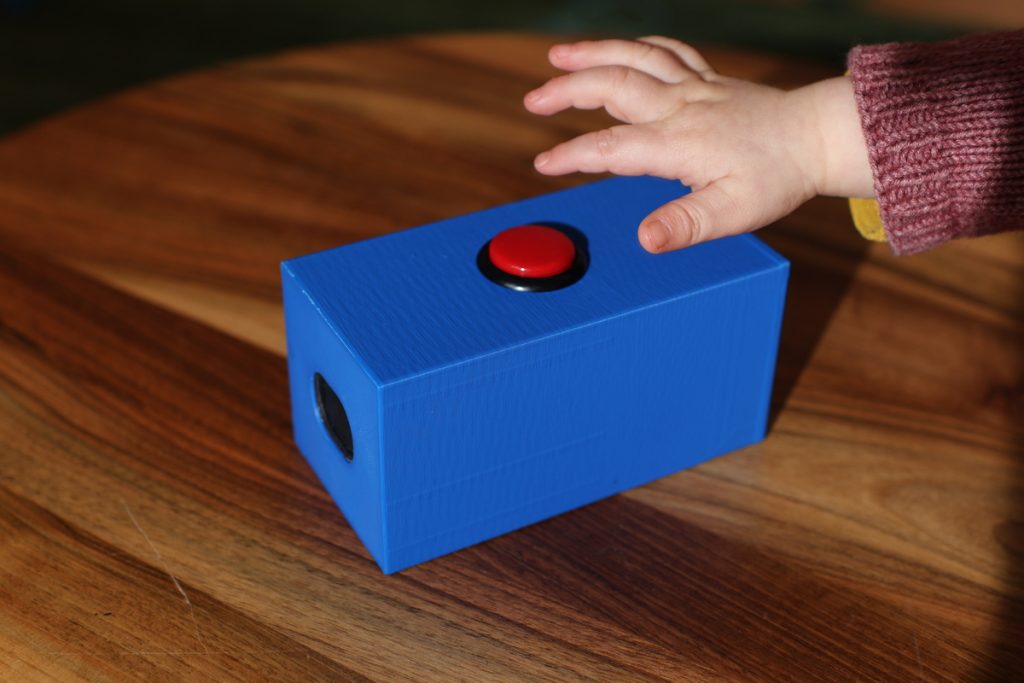
The 3D models for the box are available on Printables. Here’s a list of parts:
- Microcontroller WeAct Studio RP2040 – 2MB variant
- Amplifier Max98357 I2S 3W Class D
- Arcade button Sanwa 30mm
- Speaker 4 Ohm 2W
- Heat-set M4 threaded inserts
- M4 screws
- 5000mAh powerbank with USB-C port
The code itself is pretty straightforward:
import board
import audiomp3
import audiobusio
import alarm

audio = audiobusio.I2SOut(board.GP0, board.GP1, board.GP2)
mp3 = audiomp3.MP3Decoder(open("song.mp3", "rb"))

while True:
    audio.play(mp3)
    while audio.playing:
        pass

    print("Going to sleep")
    pin_alarm = alarm.pin.PinAlarm(pin=board.GP15, value=False, pull=True)
    alarm.light_sleep_until_alarms(pin_alarm)
    print("Waking up")
I must say, my daughter really enjoys the toy; she loves pushing the button repeatedly. After a couple of weeks, she got tired of it, so I changed the song, and now the toy has regained her interest.